24 December 2013

Merry Christmas from the Sudan


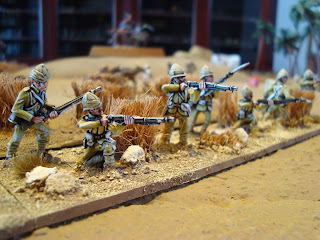
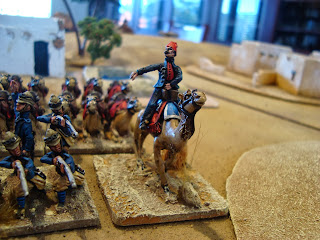
Christmas rush at H'Arrids in on the outskirts of downtown Suakin Yorks and Lancs looking for something to roast are also on patrol!  Perhaps a bit of flour and water and a nice fire might even get some 'puds going. 

Well the year has flown!  It has been quite a busy past two months with work, new ERP systems, new procedures, Christmas entertaining , Ashes cricket (pretty good from this part of the globe on this occasion let me tell you!) and just a little bit of wargaming in the Sudan period.

The club has moved to a new location in North Perth with a bar, BBQ on Wednesday nights (Hamburger and a pint for $10.00 anyone?) and the atmosphere is sensational.  Great little place and the members all seem pretty happy.

Christmas mail arriving into port whilst operations go on in the distance.
The Sudan collection has been put away after many months of repainting, re basing and general tarting up of older units and getting newer chaps ready for combat.  To clear the decks so to speak I have moved about 60% into the cabinets that line the wargames room upstairs so as to kick start a few other projects on the go in Napoleonics especially.

The lads are all ready for a quiet rest...only for a little while though.
The big plans for the new year in the Sudan include getting the final pdf version available for anyone who wants it along with the random event cards being printed up and available as well.  Then onto some attempted replicas of some of the Gilder vignettes seen on Alte Fritzs blog as well as Old School Wargamers and the older style magazines still in my possession.


Can never have enough Imperial troops you know!
As well as these chaps...though some still need their bases finished. 
Small project in January perhaps.
I wonder if the Boxing Day sales will be this quiet in your neck of the woods


Though the locals always know where to find a bargain, just off the beaten track.
 Thank you so much for all your wonderful support, friendly comments and encouragements along the way since the blog was launched mid-year.  They are all truly appreciated and give me a little bit more pep when deciding to pick up a brush and put a lick of paint on a figure.

I hope that you all have a wonderful Christmas and New Year and that your families and friends are safe and well.  Here's hoping there is a small metal or book gaming delight in your stocking on Christmas morning.

For me I cannot wait for Christmas night with a glass of port, some walnuts to crack by my side, a slice of Dundee Cake and a good book whilst the boys enjoy their toys and my wife a good movie.

Heavenly!

27 November 2013

Skirmish formation troops for the Sudan

"Kents" off hunting...Connoisseur British on the job.

Just a quick post today to depict some of the new skirmish bases that have been completed in the past few weeks.  As those who have followed the rules and the blog over the past months know, Imperial formations can dispatch some of their companies into skirmisher formation in order to try and detect ambushes etc. well ahead of the main body.


The full three skirmisher bases in action.
 I also took the opportunity to put together three skirmisher bases of Camel Corps troops.  Unfortunately Connoisseur do not have any more variations in their range for these troops other than an Officer, trooper standing firing and ditto for one kneeling.

Fortunately Redoubt have some very nice figures that are similar in size to Connoisseur (if not a bit better fed!) in a wide variety of poses.


Redoubt Camel Corps Troopers and Officers in skirmish order. 

These are what I used to depict these lads out and about looking for some forage and coming across some locals that may need them to be at their best in order to get back to camp!  Enough variation in pose I think you will agree to give the right look to the unit.

17 November 2013

Indian Screw Gun - Sudan

With a keen intent these 7 pdrs are ready to unleash upon some
enemy skirmishing Hadendowah to their front - mix of Foundry
 and Connoisseur gunners and connoisseur screw guns.

Smoking my pipe on the mountings, sniffing the morning cool,
I walks in my old brown gaiters along o' my own brown mule,
With seventy odd gunners behind me, an' never a beggar forgets
That it's only the pick of the Army that handles the dear little pets - 'Tss! 'Tss!

For you all loves the screw guns - the screw guns they all loves you!
So when we calls round with a few guns, o' course you will know what to do - hoo! hoo!
Just send in your Chief and surrender -  it's worse if you fights or you runs:
You may go where you please, you can skid up the trees, but you don't get away from the guns!
Excerpt from 'Screw Guns' by the great Rudyard Kipling.

The Sands of the Sudan project continues on despite life's distractions.

For this post I thought it would be an opportunity to bring out the old Indian Screw Gun battery that has seen a good deal of action over the years.  These figures are actually from the excellent Foundry NW Frontier range and despite the purists I am sure being able to pick a few details out they serve the purpose admirably for me and fellow gamers.  The fez topped British Officer, chap with binoculars (observant young fellow from Harrow I am told!) and the mounted officer are all Connoisseur as are the guns, the camels and the Indian handler.


Doesn't light make such a difference when it comes to colour
perception through the lens of an amateur cameraman!

These figures were all painted by me quite some time ago however I took the opportunity to tidy them up recently with some medium shade army painter dip and the complete repaint of the bases which I think has brought them up quite well.


Another view of the battery defending the old molasses store.


By the way the wonderful extract from Kipling at the top of this post was first seen many years ago at school when reading "The Man who would be King and other stories" from the wonderful Rudyard K.  I was reminded of it when visiting the excellent site "Diary of a Gaming Magpie" and thought it was quite apt to place in here as well.  If you get a chance, visit his site for some very, very nice work.

3 November 2013

Sudan Rules - Final Chapter


Spot of bother here for these Highlanders a long way from home.

After Combat

Once all casualties have been calculated it is necessary to determine the melee result.

The Mahdists are able to “Win’, “Be beaten” or “Be beaten badly”.

To win they must simply cause more casualties to the Imperial troops they are in contact with during the bound.  Remember that if this is the first round of combat, the Imperial player is able to count his shooting casualties upon the Mahdists as part of the casualties he has received for determining who has won.

If the Mahdists do win, the melee continues into the next bound.  However, the Mahdists are now able to fight with double the number of Imperial Troops fighting them as long as they have that many figures in their formation.

The Mahdist forces are beaten if the total number of casualties in terms of FIGURES LOST from the first round of combat, in addition to the shooting casualties as they came into contact, exceeds those of the Imperial player.  If this occurs, the Mahdist forces must take a reaction test and act accordingly.

If the Mahdist happens to get a positive reaction test and continue to melee they are then able to fight again next round with all the advantages already detailed.

Finally the Mahdists can be beaten badly.  This occurs when their force has suffered three times as many casualties as they have inflicted upon the enemy and those casualties are at least 10% of their total force in the unit.  Once again this figure must be calculated in FIGURES.

Troops that are “Beaten Badly” roll their reaction test on a different level on the reaction chart making it much easier for the Imperial troops to force an enemy withdrawal. 


Camerons await their noble foe on the plains.


Example:

The First Battalion, Cameron Highlanders, 48 figures strong arranged in four full-strength companies, are in line awaiting the onslaught of the Mahdist horde of 16  bases (the equivalent of 160 figures) to their front and slightly uphill.  Their fifth company has been seconded out scouting to the South for the purposes of this example.

The reaction tests are completed for all Mahdists troops and this particular unit rolls the right dice to charge the Camerons.  They are then moved into contact though this does not prevent the unit being fired upon by the unit they are charging.


The Mahdist Emir likes the look of this isolated regiment!

All fire is calculated at the closest point after movement so the Camerons open up with 48 rifles at point blank range (under 1’).  First they need to roll a d10 to ensure that they hit – at this range anything but a 1 is fine normally however as the unit is also charging they need to roll greater than a 2.  They roll 4 so a hit is scored.

The fire factor for Imperial troops firing at close range at foot is 4.  The Imperial player then rolls a d6 to determine his random factor and rolls a three giving him a plus one for a final factor of 5.

He then cross –references 48 figures firing at a factor of 5 (24 figures firing at five doubled since the chart only goes so far!) resulting in 202 casualties.  The Mahdist player records this on his roster and prepares for melee.


Roll the to hit and random factor dice together - it will save time.

Combat ensues.  Let’s assume that the Mahdists frontage is very close to that of the Camerons as we always try and maximise troops fighting.  In the first round we have 24 Camerons fighting and thus only 24 Mahdists fighting as well as they can only fight back with the same number.

The Mahdist horde hits like a tsunami - can the Camerons hold?
The melee factor for the Camerons against foot is 4 with no other additions.  They roll a 5 on a d6 for the random factor giving a -1 result.  A final factor of 3.

The melee factor for the Mahdists are 2 for fighting foot  with plus one for charging with the advantage of ground (remember they were uphill.  They roll a 2 on a d6 and have a net +1 result in melee for the random factor.  Final factor of 4.


White Imperial dice and blood red Mahdist!!

So lets see, 24 Camerons at a factor of 3 inflict 71 casualties on the Mahdists in combat.  In addition to the 202 shooting casualties they have received this turn a total of 273 casualties are on the unit.  We need to break this down to actual figures so a d10 rolled for the .3.  A 5 is rolled so only 27 figures are removed.

The Mahdists have 24 figures at a factor of 4 inflicting 85 casualties on the Camerons.  They also roll for the potential additional loss and roll a 4.  Unfortunately they lose 9 figures and the commander elects not to roll again on Officer Casualties as he feels they should be ok this round.

A full base of Imperials are removed and a further three are marked off their roster.


A view from the top of the rise.  Surely overwhelming odds!


The Mahdists have suffered three times as many casualties and certainly well over 10% of their force total in figures lost.  This means they have been beaten badly and need to roll on the appropriate Reaction Table.  Only a roll of 3 or 11 will allow them to “stick” and remain in contact.  They roll a 5 and a 6 on 2d6 and decide that there is more fighting to be had today.

The Imperial troops groan in anticipation of a fierce second round of combat.

Let’s assume no other troops enter the fray and the next turn is arrived at with the same situation.

In this bound, all the remaining Imperial Troops can fight which equates to 39 figures.  However the Mahdists can now fight back with twice that number i.e. 78 figures.


Second round of combat with the casualties on the Mahdists
shown with two bases removed from the rear of the "formation".

The Camerons have 39 figures fighting at a factor of 4.  They roll a 1 on the Random table with a d6 giving them a +2.  Thank God they cry!  Final factor of 6 results in 195 casualties to the Mahdists.

The Mahdists have 78 figures at a factor of 2 and roll a 4 on the random factor giving them a +0 and a final factor of 2.  Using the table this gives us a total loss of casualties on the Imperial troops of 200. 

This now needs to be broken down into whole figures – the Camerons have lost 20 figures so no rolling is required.


Still very tight in the trenches despite the Imperial +2 in the random die roll!

The Mahdists have lost a minimum of 19 figures with the potential of a 20th.  A roll of 6-19 on a d10 will mean they have only lost 19 figures and have won the melee.  Very bad news for the Camerons.  They roll a 3 and instead end up with the same losses of 20 figures and must react again.  Remember they can only win or lose a melee; a draw is an Imperial win all the time.

This time they roll a 6 on the reaction table and get an L result which means they must withdraw out of range at evade speed for at least three turns.

The Camerons have hung on by the skin of their Highland teeth!


The reaction test provides sweet relief for the boys in Khaki.

"Never in doubt my boys - now lets have a belt
of Scotland the Brave on those wee pipes now young Tavish!".
  Looks like I need to dull coat this particular shiny new officer.


Winning the game

For the Imperial troops, completing their assigned tasks in the allocated number of turns results in their victory.

Obviously for the Mahdists, they are the victors if this is not achieved, with the knowledge that the greater losses inflicted upon the Imperial forces, the larger the headlines in the Fleet Street papers back in London and around the Empire trumpeting the disaster in the “Sands of the Sudan”!

Happy soldiering.

27 October 2013

Colonel Lambert of the Guards

Colonel Lambert leads the way.

The commanding officer for the Guards Camel Regiment is the Connoisseur figure of General Gordon of Khartoum.  The figure is very nice however he will not feature prominently in my table top battles as such as he is holed up awaiting the relief column.

Instead this figure represents my fictional Colonel Richard Lambert fresh off the boat after scoring a first half goal against Fulham (yes I am a huge Saints fan!!).  Obviously the journey was longish as he has had time to grow a resplendent moustache.

He sports a nice scar across his right cheek as a reminder of his encounters with the fuzzies at Omara Springs some years previously and prefers the finery of his blue matinee coat and trousers to the uncomfortable army issue rags he conveniently lost somewhere in transit over the Mediterranean.

Helmet strapped to the side in case of some nastiness from the locals.

The one modification I did make to the figure is the helmet which I chopped off a Redoubt Camel Corp Officer who had unfortunately lost his hand somewhere in the spares box and fastened to the side of the figure which I think looks quite smart.                                                                                                 

The good Colonel prepares to give the regiment the
order to open  fire...or is that an order for a nice gin and tonic?


21 October 2013

Guard Camel Corps - dismounted and in for a big surprise!


"This seemed like a good place to camp last night Jenkins?".
Guards look like they are up against it near the cooling oasis.

A few posts ago I put up a few shots of the Guards Camel Corp resplendent upon their steeds and looking quite smart in their Khaki and Blue..ish...tunics.  I also commented that their was a heck of a lot of metal in the regiment and that was without these boys on show.

"Nice and steady now chaps ...that's a good boy Gumbleton". 
Connoisseur Camel corps troops firing in the standing and kneeling
position and a wonderfully sculpted officer keeping them all in order.

 This unit contains 48 foot figures, 47 wonderful dismounted camels and one highly efficient and dedicated native servant who looks after these camels like they were his own...or at least they will be when his uncle the Emir of Kafira is finished with this lot.

Nice view from the...well...the rear.  "Stop that snickering
private haven't you ever seen a camels arse before?".


It is tough keeping these beasts happy at the best of times let alone with all this yelling!

The Camels can serve several purposes on the battlefield.  Obviously they look the part when the boys dismount and believe me in these rules you do not want to be British troops fighting hte brave Mahdists on camel let me assure you.  Also they can be fought behind at a push providing some level of cover.  Just might be tough remounting afterwards if you go down that path!


Nice view of the desert pool cleverly made by my good friend Mike out
of an old photo frame on sale for a dollar and some mdf.  He really is clever our Wardy! 


Nice shot of the boys in their finery looking at the challenge ahead.


That table edge can be a bit of a bugger when you are the Inmperial player.

Nice view of the boys from another angle. 
Hope the boys have remembered the "Rapid Fire" rule.

Next post hopefully before the weekend will be the final installment of the rules and then a few play throughs of the rules and hopefully a few qusetions and requests for rules and event cards.  Lets see what happens.

7 October 2013

"Hussars sah...hundreds of the buggers!"


19th Hussars resplendent in grey and brown!

As the Gilder Sudan project motors along it has proved to be a perfect fillip for me to get things moving that have shall we say lay dormant for quite sometime...and I am not talking about the need for prune juice and fibre for the clever dicks out there!!

Having the enormous amount of lead that was acquired from Connoisseur in both past and present from both Chris and Andrew, the need was to get them painted, based and ready for action.

Connoisseur Sudan Hussars and horses though
 slightly limited in poses available are still wonderfully animated.

The 19th Hussars are a new unit and quite resplendent in their grey jackets and brown trousers.  They have yet to see action however that will change quite shortly.


Another view of the 19th Hussars


"Follow me chaps" ...what could possibly go
wrong for the "Hero of Ndoko Gorge!"

Lovely Connoisseur horses still stand the test of time - tremendously wonderful sculpts.

A very much older unit that I have had in the collection for quite some time are the wonderfully battle hardened veterans of the 10th Hussars.  These boys have fought in every campaign that we have played at the NWS and, similarly to the 21st Lancers in an earlier post, have been remounted on Connoisseur horses rather than the mish-mash of Elite and other assorted "nags" that I had at the time.


10th Hussars parades their first two squadrons.

I have certainly found that the regular posts on the blog have helped me stay focused on the quite large product of basing the new figures, tarting up the old bases as well as certainly sprucing up the old figures that were painted quite some time ago.  The task is a big one when as so many of you would already attest, one is juggling family life, a career and all that goes with them.  It is very easy to suddenly have lost a weekend in the garden, on sporting fields or simply in a good book.


Once again Sudan Connoisseur range
Hussars with some slight modifications to their helmet.

These Hussars were painted for me many years ago by the very talented Gerry Webb  of Castaway Arts fame who also modified the figures to have the famous spike atop the 10th's helmets.  They are a favourite unit and their blue trousers with yellow stripe look, in my opinion, quite sharp!

"Hard to keep the kit pristine in this damned country you know Faversham"

"At least the heat helps keep the creases quite sharp sir!"
Next post will be the final instalment of the rules along with some thoughts on modifications to the reaction cards and the start of some walk-throughs with actual battles on the table top.

Until then.

29 September 2013

Sudan Rules - Close Combat Mechanics

At the pointy end..hope the Mahdists don't "stick"!!

Close Combat

Close Combat takes place whenever two opposition units have charged into each other or one or the other has been charged or is charging.  Clear as mud!

A unit must move a minimum of 1” if foot or 2” if mounted to count as charging.

If any unit is charged in the flank or rear, they are only permitted to turn the figures that are contacted to face the enemy and fight.  For example a battalion in line caught in the flank can only fight back with two figures.

Under no other circumstances are figures allowed to fire or change formation (other than to turn those contacted figures to face that is).

Remember that this is a fun game so when a charge is measured and it may be in or out by a fraction of an inch the game encourages contact.  Push the charges in and put your faith in lucky dice and pure steel!

Always try and maximise contact with units as well.  If a unit has charge on an angle (not flank or rear of course) and just makes it into contact, wheel the unit into frontal contact to maximise figures fighting.

Naval Brigade prepare to dispatch some excited Fuzzies...hopefully!

Troops entitled to fight

In the initial round of combat, only the first rank of Imperial troops is entitled to fight.  As a consequence, only the same numbers of Mahdists are entitled to fight regardless of how many actual figures are in their formation.

If the Mahdists reactions after combat allow them to remain in contact in the second round, or indeed if the Mahdists have won the initial round of combat, the following occurs:

The Imperial player is entitled to fight his second rank of troops which generally means he can fight his whole squadron, battery, company or battalion.  The Mahdists are then allowed to fight back with TWICE the number of figures that they are fighting against.

If fate should allow it through the appropriate Mahdist reaction test result and combat should enter a third round, the Mahdist player is then entitled to use FIVE times the number of Imperial troops he is fighting against as long as there are that many figures on the actual unit.

Troops who have been charged that turn but who also inflicted casualties upon the enemy unit before they charged in with fire can count the casualties caused in addition to close combat casualties for the melee result.

Mahdists in melee may not be fired upon unless the unit has more than 100 figures in it.   If the formation does have more than 100 figures, it can then be the target of support fire from any other Imperial unit other than those it is meleeing with and as long as they comply with all firing requirements in terms of arcs, ranges etc.

These casualties count towards the melee result in terms of casualties that are received and inflicted by the Mahdists.

It is important to remember that though all casualties in firing and melee are calculated using the melee chart, all must now be converted to ACTUAL FIGURES LOST.  Therefore if a result shows that an Imperial unit lost 73 casualties that turn, we know they have lost seven figures with a possibility of a third if the player rolls between 4-10 on a ten-sided diced.  A roll of a 1, 2 or 3 would mean that the unit has lost eight figures.  The same applies for the Mahdists however they do not have the option of using an officer if the first roll is failed.


Bengal Lancers find someone lurking in the mimosa.
Imperial Melee Factors chart

IMPERIAL TROOPS MELEE FACTOR
Troop Type
Camels
Cavalry
Infantry


Cavalry
3
4
5
Dismounted Cavalry
1
2
2
Infantry
2
2
4
Camel Corps
2
2
4


Fighting behind a prepared position                                                                       +1
Charging with advantage of ground                                                                        +1
If Lancers in first round
                                  +2
All Egyptian/Sudanese troops
                                  - 1
Mahdist are in Cover
                                  - 2
Camel Corps fighting on camels                                                                              - 2
Mahdist are in prepared cover                                                                                  - 3


MAHDIST TROOPS MELEE FACTOR TABLE


Troop Type/ Opponent
Camel Corps
Cavalry
Foot
Improvised
Prepared

Mounted


Cover
Cover
Cavalry
3
2
4
1
-2
Infantry
2
1
4
2
-1
Camels
4
3
5
1
-2


If unit has an Emir with it


+1
Charging with advantage of ground

+2
Within 18" and in sight of the Mahdi

+2
Rifle armed foot in melee


-1
Unit is Fuzzy Wuzzy


+1

  
 Modifiers are then applied and as is the case for the firing procedure, a random factor is achieved by rolling a dice and referring to the Fire and Melee Random chart.


Local War Corespondent capturing
some images - for the London Newspapers perhaps?
 Next post - After Combat, Combat examples and winning the game!